How to Enable & Disable AutoPlay on Spotify (New Method)
Are you tired of Spotify taking over your audio system each time a song achieves It is not just you. When the following song suddenly begins to play, especially if you do not like it, it might be irritating! Thankfully, turning off Spotify AutoPlay only requires a few mouse clicks. To give you complete control over your listening experience, we will go over how to enable and disable Spotify’s AutoPlay feature in detail in this blog post.
We will go over things like where to look for and change settings, possible problems to look out for, and how to make customized playlists for every circumstance. After going through this article, you must have all the knowledge you need to make sure those erratic Spotify songs never disturb your channel again!
Around the world, millions of people use Spotify to stream music. Each of these individuals has a unique taste in music and preferred methods of listening to it. Some users like to stick to the songs they have handpicked for their playlists, while others do not mind receiving song references while listening to their favorite tunes.
How to Enable & Disable Spotify AutoPlay on Desktop
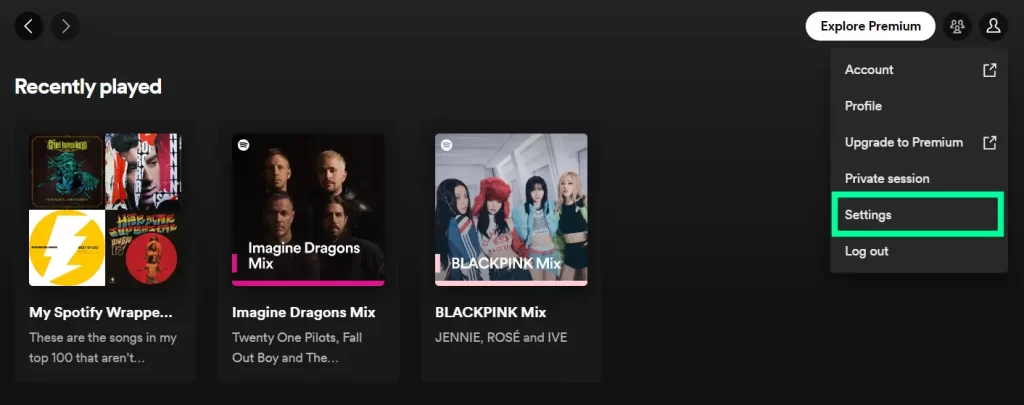
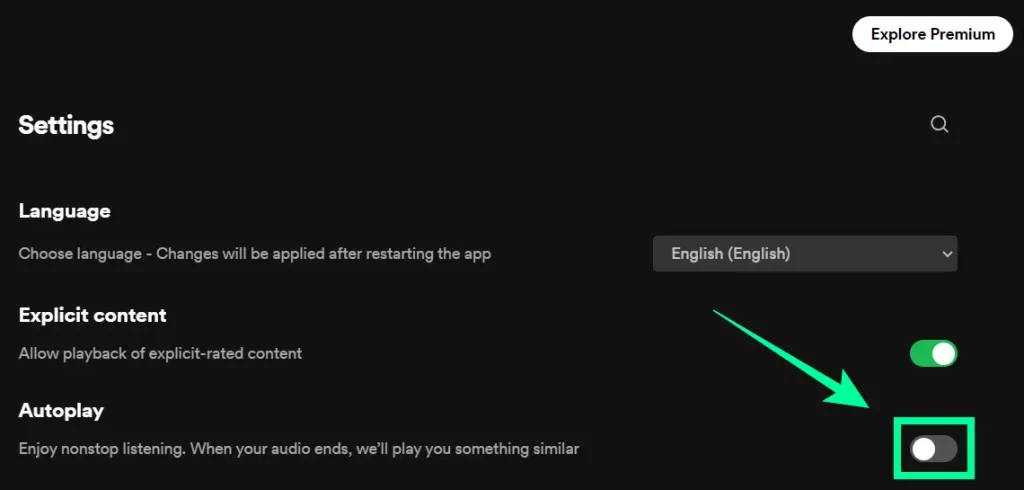
To enable and disable AutoPlay on Spotify, first open the app. Then, tap into your Profile tab and select Settings. Once in the settings menu, scroll down to the AutoPlay section and you’ll see two options:
- Enable AutoPlay – This will turn on AutoPlay for any song or album that you have in your library.

- Disable AutoPlay – This will turn off AutoPlay for any song or album that you have in your library.
Once you’ve made the changes, make sure to save them and then restart the Spotify app for them to take effect.
Read more: When does Spotify Wrapped come out?
How to Enable & Disable Spotify AutoPlay on Mobile
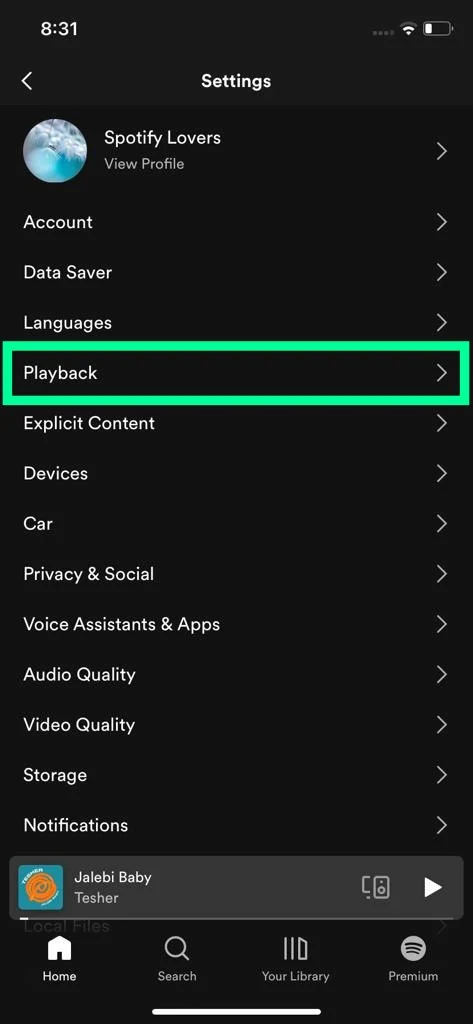
First and foremost log into your Spotify account by visiting the Spotify website. Once you have logged into your account, click on the “Settings” tab at the top right corner of the page. This will open up a new page with several options for customizing your experience with Spotify. Scroll down until you find the “Playback” section and click on it to expand it.

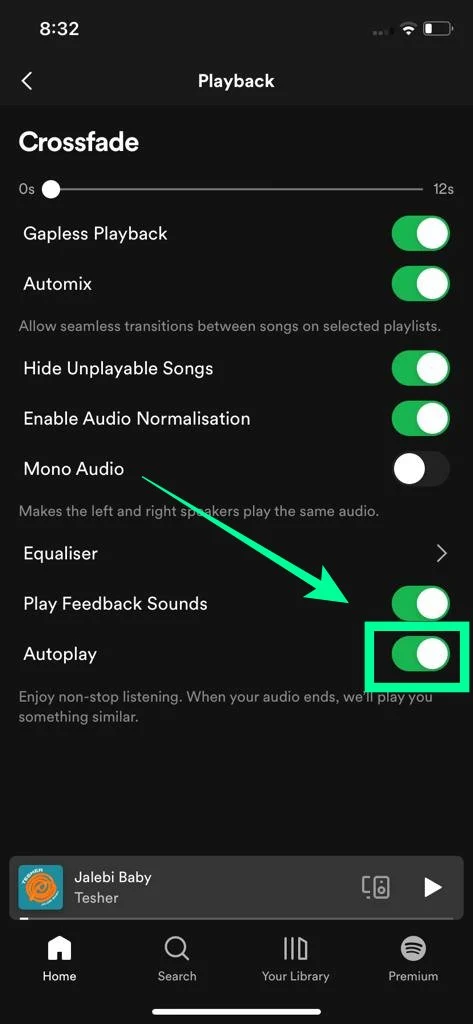
Within this section, there will be an option to enable or disable AutoPlay. If you would like to enable AutoPlay, simply select the checkbox next to “Autoplay”. If you would like to disable Autoplay, uncheck this box.
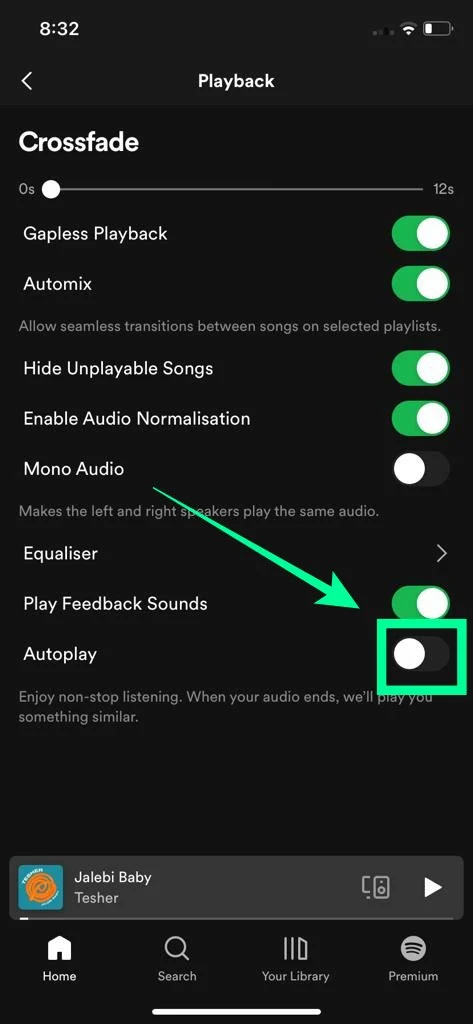
Finally, once you have enabled or disabled AutoPlay, it is important to check that your settings have been saved correctly by returning to the Home page of your account and playing a song or playlist from there. If AutoPlay is enabled, then after one song has finished playing another should automatically start playing without any input from you; if AutoPlay is disabled then no songs should play after one has finished unless manually selected by you.
Conclusion
We hope that the above information has made it simple and easy for you to turn on or off Spotify AutoPlay. Those who want to quickly move between their playlists without having to start and stop them manually will find this function quite helpful. Users can save time and engage in other activities while still enjoying their favorite music thanks to the suitable AutoPlay feature. This week, spend some time learning about the AutoPlay tool and all of its useful options. Do not be scared to try out various shapes and explore the possibilities that come with streaming music! In addition, never forget to have fun and enjoy yourself.